 FolderAtlas
History and saved scans
A snapshot saves a whole scan so you can reopen it later. Once you have a snapshot, the History view compares it with the drive as it is now and lists the folders that grew or shrank the most.
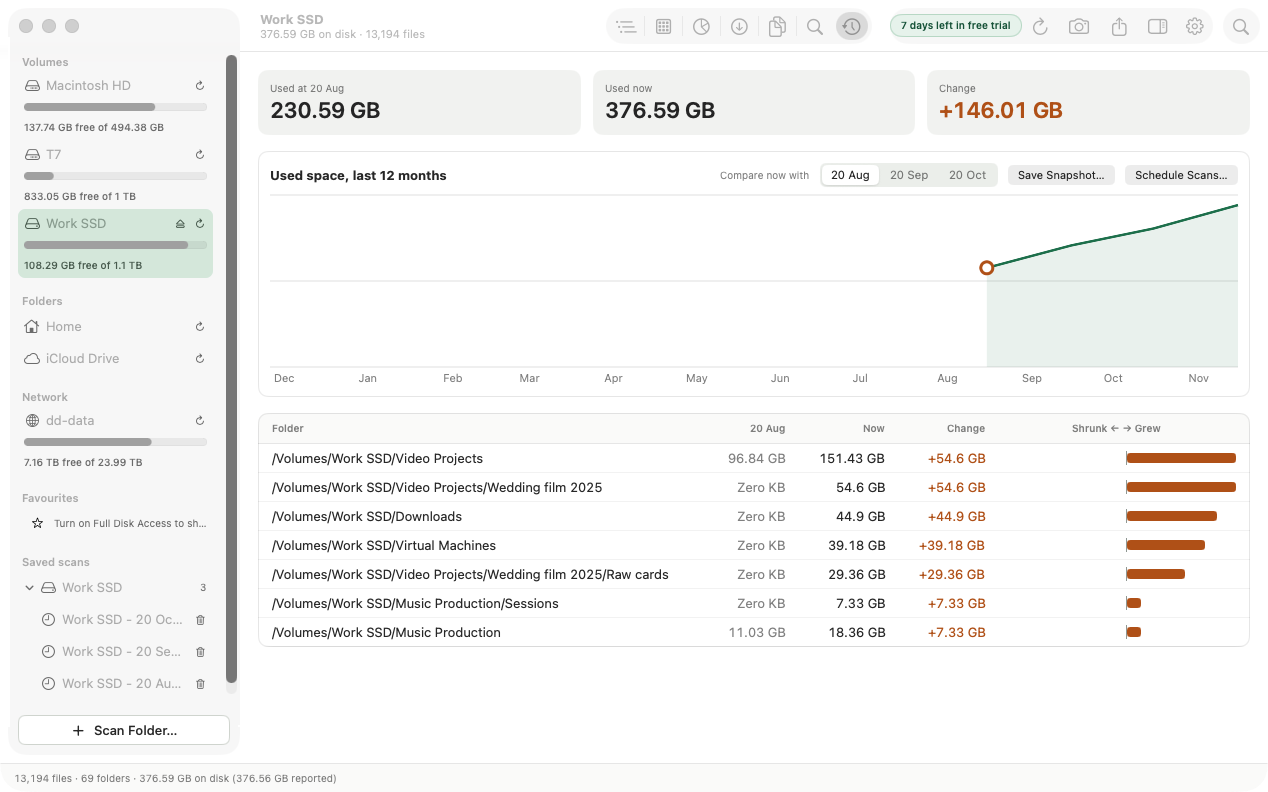
Save a snapshot
- Scan a drive or folder.
- Click Save Snapshot… in the toolbar or in the History view.
- Give it a name and, if you like, a note. Click Save Snapshot.
A snapshot stores every file and folder in the scan. It is saved on your Mac, inside the app's own storage, and is never uploaded. To save snapshots automatically, set up a scheduled scan.
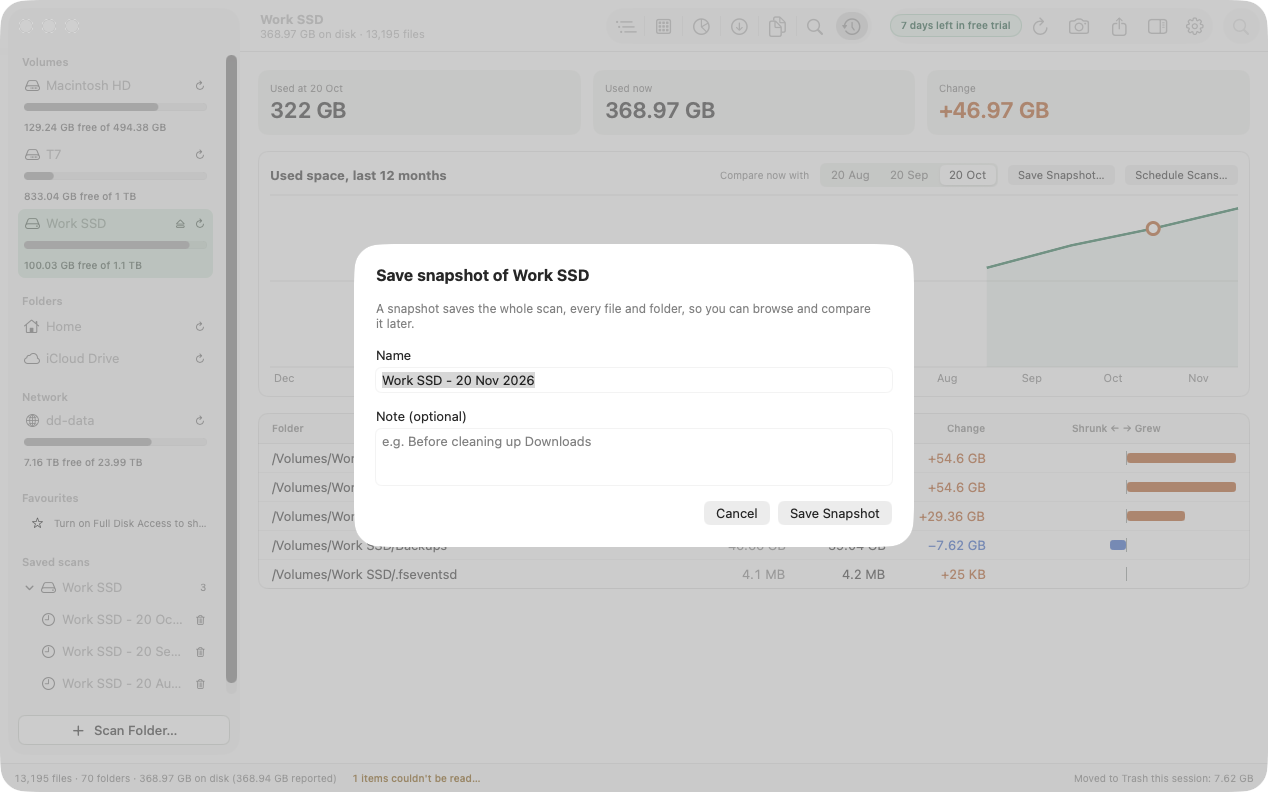
See what has grown
Scan the same location again and switch to History (⌘7).
- The cards show the space used at the snapshot, the space used now, and the change.
- The chart plots used space across your snapshots for the last 12 months.
- Compare now with chooses which of your recent snapshots to compare against.
- The table lists the 50 folders that changed the most, with their size then, their size now, and a bar showing whether they shrank or grew.
History always compares a snapshot with the current scan. It does not compare two snapshots with each other.
Open a saved scan
Saved scans are listed in the sidebar under Saved scans. Several snapshots of the same location are grouped together. Click one to open it.
A saved scan is read-only. You can browse it in Tree, Treemap, File Types, Largest Files and Search, which is handy for looking at a drive that is not connected. Duplicates, Move to Trash and Rescan are not available, because the snapshot is a record and not the live drive. Click Back to Live Scan to return.
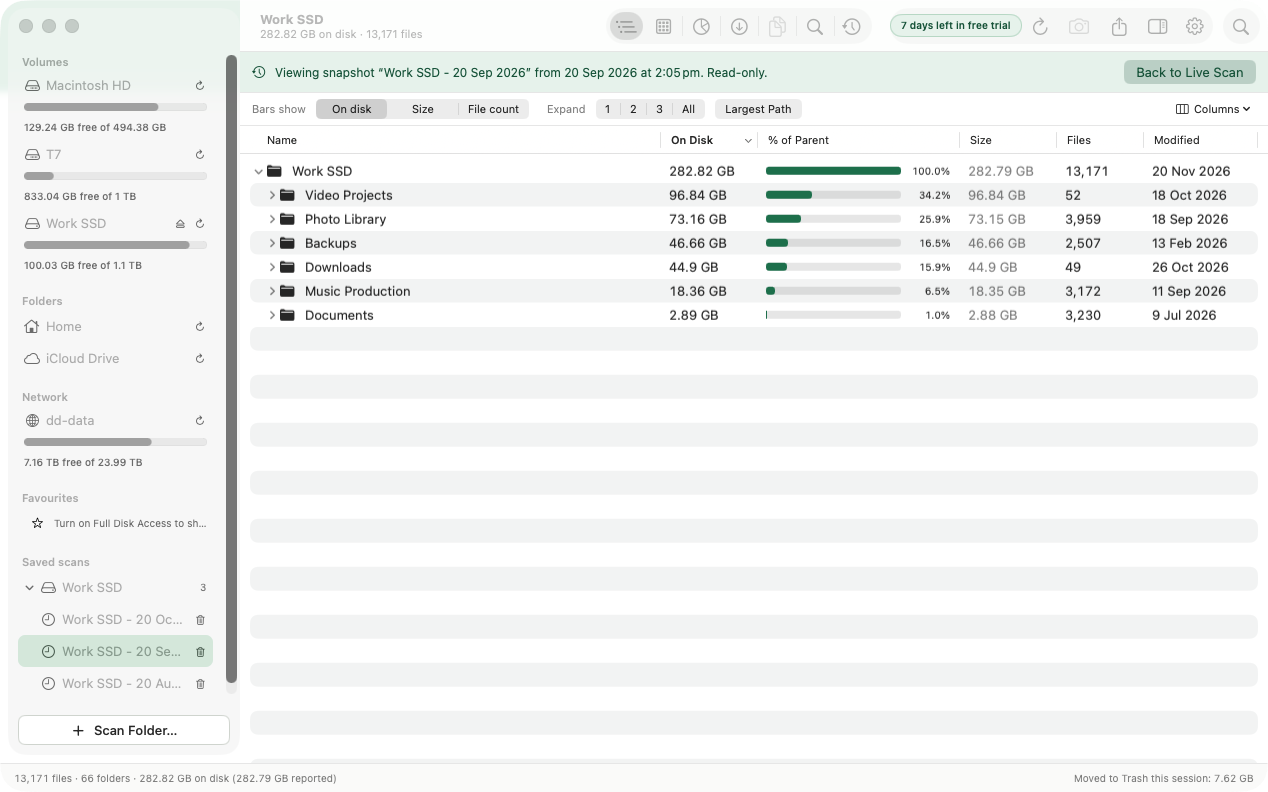
Delete a saved scan
Point at it in the sidebar and click the trash icon, or right-click and choose Delete Saved Scan…. This removes only the snapshot, not any of your files, and cannot be undone.
Last updated: 20 November 2026