 FolderAtlas
Scheduled scans
In Settings › Schedules, click Add Schedule…, choose a location, how often and what time. Each run can save a snapshot, export a report and notify you if the location has grown.
Create a schedule
- Open Settings › Schedules and click Add Schedule…. You can also click Schedule Scans… in the History view.
- Choose the Location: a volume, a standard folder, or Other Folder….
- Choose Repeat: Daily, Weekly or Monthly, and a time.
- Choose what happens after each scan (below) and click Add Schedule.
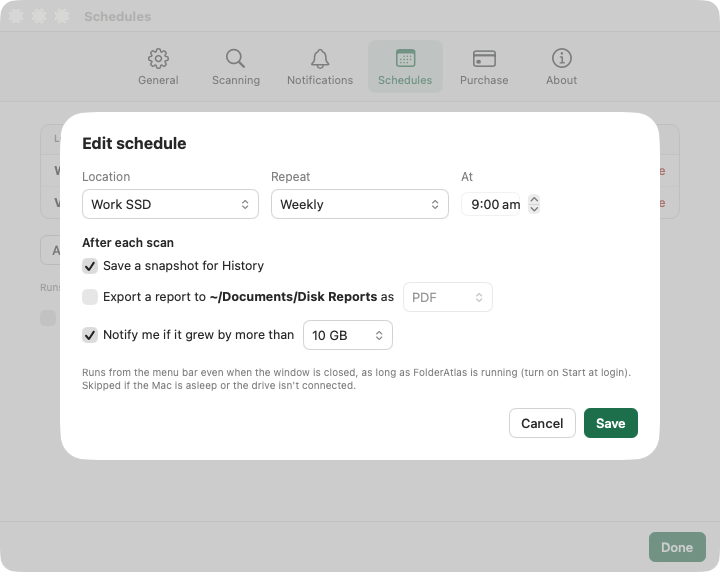
A weekly schedule runs on the weekday you created it, and a monthly one on that day of the month.
After each scan
| Option | Default | What it does |
|---|---|---|
| Save a snapshot for History | On | Adds a snapshot, so History builds up a record of growth. |
| Export a report | Off | Saves a PDF, CSV, Excel or HTML report to Documents/Disk Reports. |
| Notify me if it grew by more than | On, 10 GB | Sends a notification when the location has grown by more than 5, 10, 25 or 50 GB since the previous run. |
When schedules run
Schedules run while FolderAtlas is running. It does not need a window open: closing the window leaves FolderAtlas in the menu bar, and scans happen from there in the background.
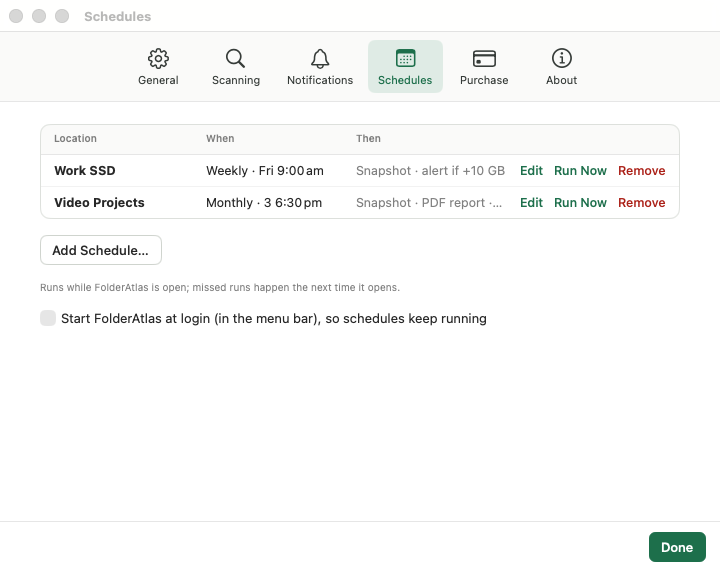
- Turn on Start FolderAtlas at login in Settings › Schedules so schedules keep running after a restart.
- If FolderAtlas was not running at the scheduled time, the scan happens the next time it opens.
- If the Mac is asleep or the drive is not connected, the run is skipped and you are told.
Manage schedules
Settings › Schedules lists each schedule with when it runs and what it does. Use Edit, Run Now or Remove.
If a schedule needs access
If you see "Scheduled scan needs access", open FolderAtlas and scan that location once by hand so macOS can ask for permission. See Full Disk Access and permissions.
Last updated: 20 November 2026